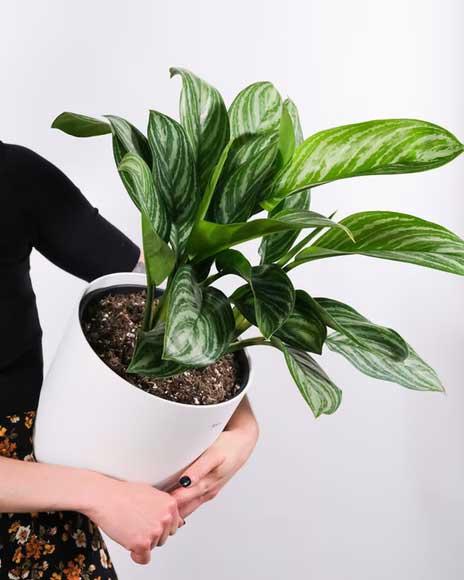
Aglaonema is one of the most precious indoor plants out there, as its beauty and longevity have linked it to prosperity and success.
However, there are days when Aglaonema might not be in its best shape. Rather than giving up on your plant, this can be the best time for a fresh start by propagation.
In this post, we’ll explain how to propagate Aglaonema successfully. We’ll also elaborate on the pros and cons of different propagation methods for this plant.
How Do I Propagate Aglaonema?
Luckily, Aglaonema can be propagated in several ways. However, there are some limitations that you’ll need to consider.
For the division process, your Aglaonema should have at least one new offshoot. If not, you can go for the second or third method, as they’ll allow you to propagate the plant even with a single stem.
Here’s a breakdown of the three propagation methods that we’d recommend for Aglaonema:
Division
Propagation by division is one of the most reliable ways to propagate Aglaonema, as the roots are already developed. Below are the steps for this process:
- Release the Plant
Use your hands to tap the sides and the base of the pot, so that the soil becomes loose from the edges. Then, spread your fingers between the plant stalks and turn the pot upside down.
A shovel might help you with this process, but make sure you use it gently.
Next, use a fork or your fingers to break through the hardened soil. Try to release as much soil as possible, so that you can clearly see where you’re making the cut.
- Cut Your Divisions
As we mentioned earlier, you’ll need to look for an offshoot to divide it from the mother plant. Avoid the middle parts of the plant and go for stems on the side, so that the original plant remains intact.
Cut clumps of leaves that are connected to developed roots. If you find any suckers connected to roots or rhizomes, you can give them a chance for growth and plant them in a separate pot.
- Root Trim
You can plant your Aglaonema divisions right away. Still, we’d suggest making a root trim, especially if your plant’s leaves were drooping, which might indicate root rot.
Even if the roots are healthy, cutting off the older segments will give the plant a fresh start.
- Add New Soil Mix
It’s better to use a soil mix that’s similar to the older mix. Still, we recommend using the following components:
- 30% typical garden soil
- 25% Coco Peat or Peat Moss
- 25% Vermicompost
- 20% Perlite
This soil mix will keep the soil aerated and facilitate excess water drainage. So, there would be less risk of root rot.
- Place Divisions in Pots
Fill the pots with some of the soil mix before placing the plants, then add more soil afterward on top to stabilize each plant division in the pot.
Finally, water the plants and cover them with clear plastic wrap to trap humidity. Keep the pots in a bright spot without exposing them to direct sunlight.
Stem Cuttings in Water
Aglaonema, like many other tropical plants, can be propagated by cutting. The beauty of this method is that you’ll get to watch the roots grow if you use a transparent container. This is a mesmerizing process, especially in winter, when there’s less growth in outdoor spaces.
You can use scissors to cut the top part of any stem, but make sure you sterilize the cutting tools, first, to prevent contamination. The cut portion should be around 4-8 inches in length.
Honestly, the mother plant might not seem presentable at the beginning. Still, you’ll be fascinated to see the cut part grow new leaves in a matter of days.
As for the detached stem, simply fill a glass cup with some water and place the stem inside. You can use elegant glass vases instead if you wish to display them at home.
A tip that we found helpful regarding propagation in water, is to use smaller containers. This would allow you to add a small amount of water so that the released growth hormone doesn’t get diluted. As a result, the roots will grow faster, and the plant can save energy for growing other parts.
Keep in mind that water isn’t the most nutritious medium for your plant. So, eventually, you’ll need to transfer Aglaonema to a soil mix when it grows numerous roots.

Stem Cuttings in Soil
This method is similar to the previous one as it requires stem cutting. However, you’ll directly transfer the stem to a soil mix.
Frankly, this method is slightly challenging, compared to the other two as its success isn’t always guaranteed.
Still, experts recommend soil for propagation as it encourages the growth of a better root system, compared to rooting in water.
Here are the steps for propagation in soil:
- Prepare the Soil Mix
This time, it’s better to use a potting mix containing 80% Cocopeat and 20% Vermicompost. Fill the pot all the way up and dig a hole in the middle to place the stem cutting.
- Treat the Stem Tip
As an optional step, you can dip the stem cutting in a hormone powder or natural aloe vera gel to encourage rooting. Add more of the powder or gel inside the hole.
- Place the Stem Cutting
Place the plant inside the hole and tap the soil lightly to hold it in place. Make sure the stem is at least 2 inches deep inside the soil.
Finally, water the plant and keep it in a bright room. You’ll need to water it again when the top layer of the soil looks dry.
Wrapping Up
Learning to manipulate the growth of your plants is an art worth mastering. Now that you’ve learned how to propagate Aglaonema, there’s a great chance you’ll be able to save withering plants and give them a new life.
Propagation through cutting or division is also a faster and more affordable way to grow your indoor garden. Added to that, it’s a beauty to spread your Aglaonema’s descendants by gifting family and friends.